
Are you a fresher looking for a job in web development? Or Are you a shopkeeper who wants to take your business online? Or You are someone who wants to start an online business? If yes, then you are at the right place.
Excited to know about WordPress website development? Or perhaps you have a question in your mind – is it possible to build a website without coding knowledge? The answer is – absolutely yes. In this article, we are going to guide you through the steps to build your first website in WordPress within just 10 mins. That’s cool right!
Maybe you will be wondering now: what will be the total expenditure in wordpress website development? You won’t believe it!! You can start your website with just 5$ per month! Isn’t it exciting? Right, so let’s get started.
In this article, we will show you easy-to-follow steps and tips so you can create a website that will surely stand out. We will take you through the whole process from choosing the best web hosting company to make your website live and running in just 10 minutes.
Steps for WordPress Website Development:
- Buy Domain
- Get hostinger web hosting
- Install & setup WordPress
- Add an SSL certificate
- Log into Your WordPress Website
- Install a WordPress theme & Pick the template from the store
- Use the customizer and page builder
- Set up an email for the contact form
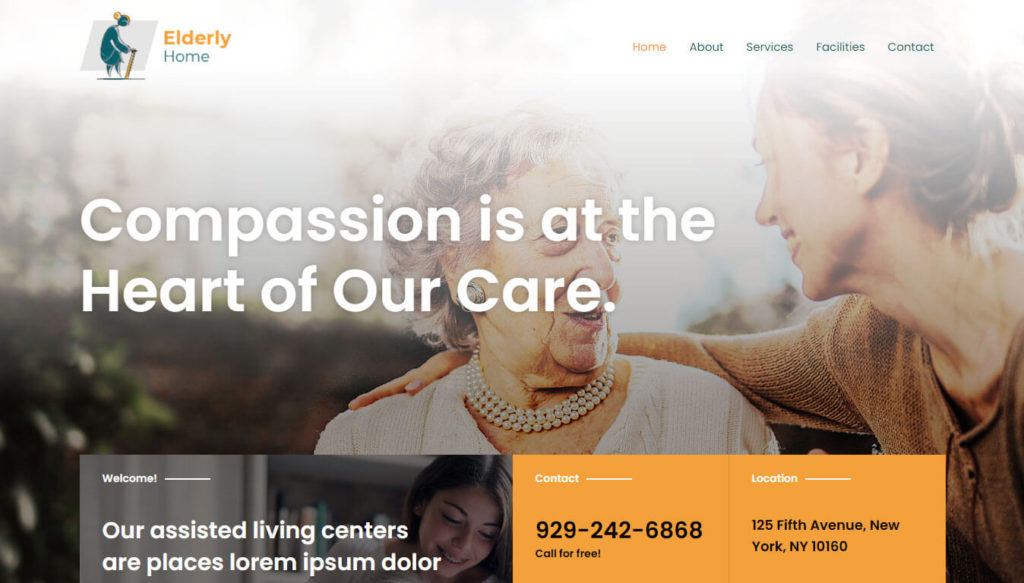
We will go through each step in detail which will give you a clear understanding of the process. Today we are going to build an elderly home website (screenshot below). Following the steps, you can build a website for any industry. So, let’s get started.
Buy Hosting & Domain
The first thing you’ll need for your wordpress website development is a domain and hosting account. Go to tranformingyoudigitally.com/web-hosting and choose a web hosting company.
For this tutorial, we’ll use hostinger web hosting. Go to their page and select Web Hosting.

Click on the “Plan & Pricing” option in the menu.
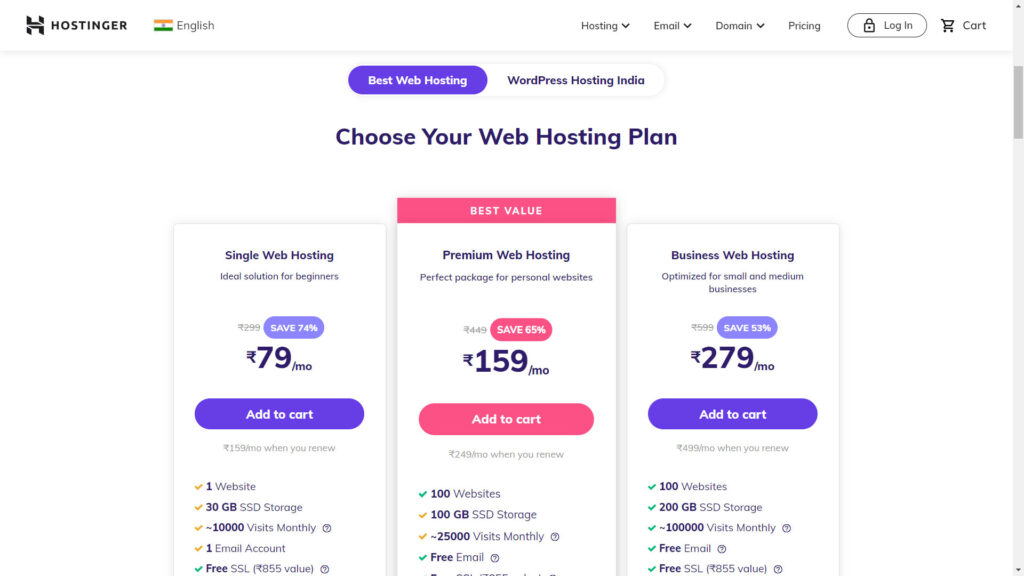
Choose shared hosting from the tab. However, you can select any other plans based on your requirement. Under shared hosting, you’ll have 3 plans to choose from. If you want to build a single website then go for the first option (FastCloud) else if you want to build multiple websites then you can go ahead with 2nd option (Premium Web Hosting)
Then you will be redirected to next page where you need to enter your domain name.
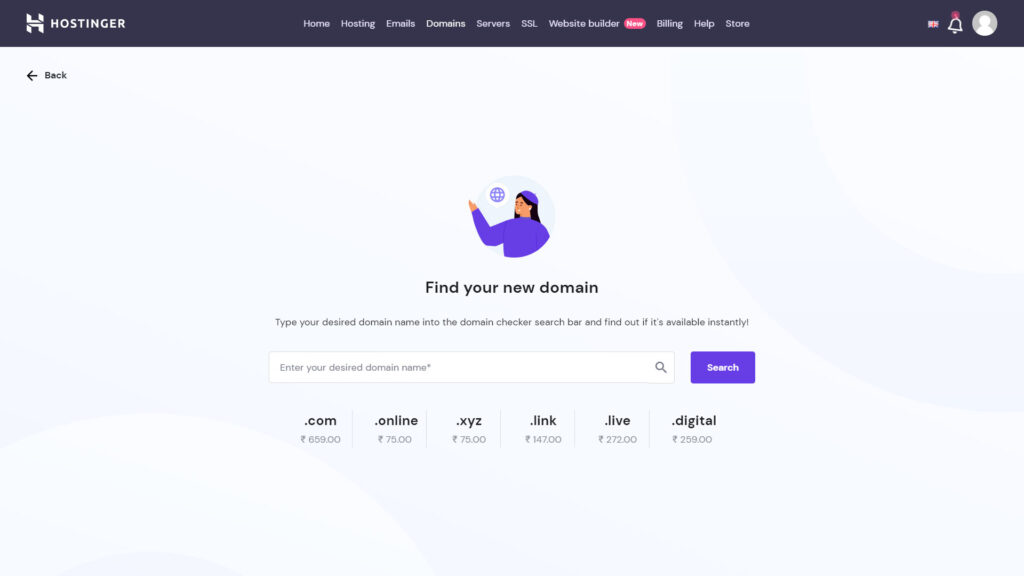
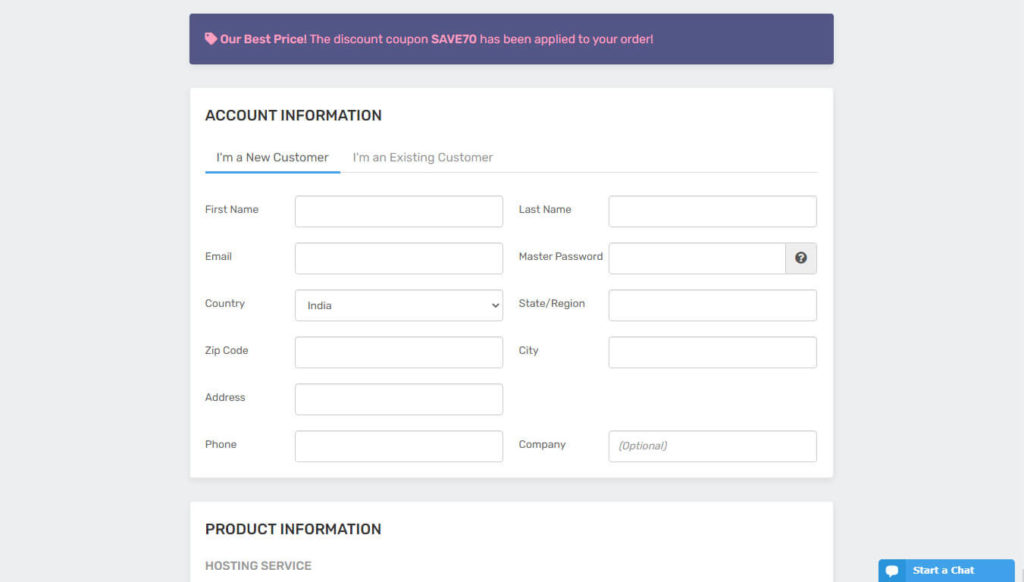
Hostinger web hosting will then check if your picked domain name is available or not. If you already have a domain, then click on “I already have a domain”, enter the domain name and you are good to go. Now proceed with filling out the required information and make the payment.
Activate SSL
All the plans of Hostinger web hosting come with a free SSL which can be integrated with the website through the hpanel.
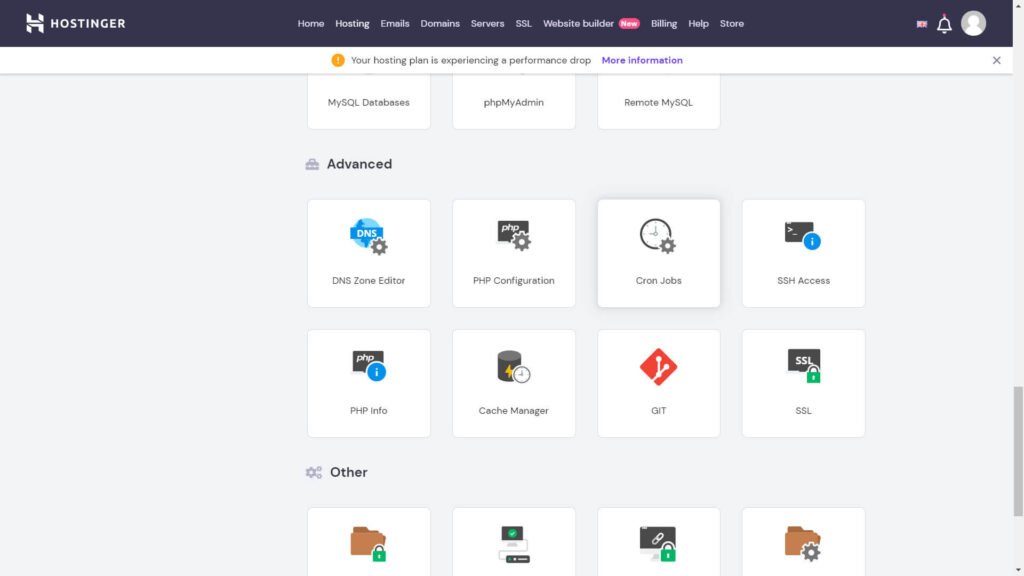
After creating your Hostinger web hosting account, log in to your account with the credential you have provided during the registration. Upon logging in, the dashboard will display the primary domain name. Then click on manage to get into hpanel.
Scroll down to the advanced section and click on the SSL option. Here you can find an option to install SSL. It is a one-click process. Once the SSL is installed, click on force HTTPS to apply HTTPS across the pages of your website.
Check the box in the image below.
The SSL certificate is now installed.
Install WordPress
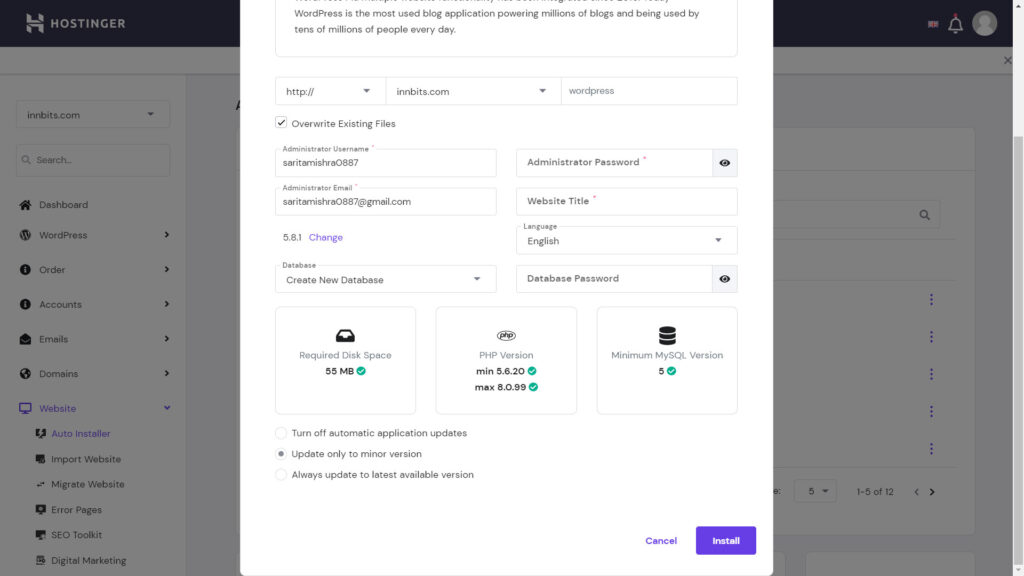
Go back to the homepage of hPanel and scroll down to the website section and then click on “Auto installer“. Then select WordPress from the options. A popup will appear.
Here’s where you begin setting up your WordPress website development. Fill out the necessary fields.
- Choose https if SSL is activated else choose http. Select your domain name from the dropdown and leave the directory field blank
- Fill in the the desired admin username and password
- Fill in the email id
- Enter your sitename
- Choose the latest version
- Choose the option to create database and enter the desired strong and unique password
- Choose your language
- Other options leave it as it if you are new to wordpress
- Click on Install
The installation will take few seconds. After installation, you will get a successful screen and URL for your live website and admin panel.
Click on the website domain URL to view the website. The website will look very basic at this moment. Don’t worry we will work on customizing the website In our further steps
Now go back to the successful page and click on the admin panel URL. This will open up the admin panel for you. If you see the login form then use the login information you created to get into your WordPress website account.

Alternatively, you can go to the admin panel using the following link:
https://yourdomain.com/wp-admin. Replace your domain with the name of your domain.
Setting up WordPress
The first step is to use the security certificate (SSL) you installed. Go to settings, then general.
Look at your URL at the “WordPress Address” and “Site Address” fields. Modify the link, just add “s” to HTTP so it will say HTTPS.
Save the changes.
WordPress will prompt you to log in again as the HTTP changed to HTTPS. Your URL has an HTTPS now.
HTTPS is mandatory nowadays for websites. It will help with your website’s SEO and the traffic to your website will be encrypted and safe.
Now again go to the permalinks option in the setting and select the post name under common settings and click on save changes.
Install a WordPress Theme
In the dashboard, go to Appearance then click on Themes. Click “Add New” Or “Wordpress.org Themes” (In the newer versions)
Click on Popular or Search for “Astra” theme using the search bar.
Hover over Astra theme and go ahead with the installation.
After installation, the theme will be added to other themes under Appearance -> Themes.
Go ahead remove all other themes. Click on any theme, find the option to Delete – generally found on the bottom right corner.
Now go back to Appearance -> Themes and click on Astra and go to the options under the Astra theme.
Now you’ll have to import the starter site. Click on “Install Importer Plugin.” Once that’s done, you’ll go to a new page. Select Elementor from the elementor. (Elementor is a page builder).
You’ll land upon the starter templates page where you can choose from a variety of website templates. For this tutorial, we will use “Elderly Home”
Click on the template you have chosen, then you’ll have option to either import the complete site or import any particular page.
A popup appears with different option to select. Leave it as it is and click on “Import”
Import process can take few minutes depending on the type of template choose.
Import Successful.
Visit your website. Hurray, your website is live and looks stunning.
Use the customizer and page builder
To Edit Your web pages, we will use a page builder – Elementor. Elementor is a drag-n-drop page-building tool that helps you create beautiful designs. Visit our article on How to edit your page with Elementor for more details.
Edit Menu
For editing menu, visit our article how to add, edit and delete menu.
Set Up the Contact Form
The next step is setting up your email to receive inquiries from a contact form on contact us page. We need to setup the contact form. Follow the article – “Setting up WPForms”
So hope you enjoyed the tutorial and your fully functional website is ready in just about 10 minutes.
Congratulations on making your new website!